
How to Plan Wall Art: From a Blank Wall to Installed
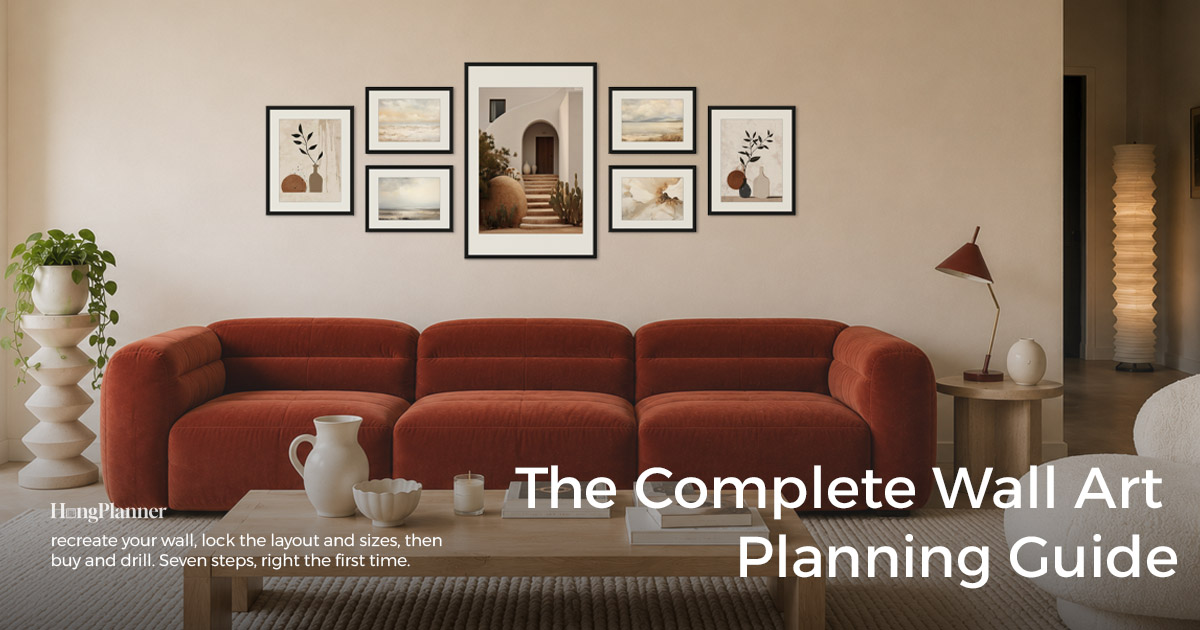
Faced with a blank wall, most people either open Pinterest for ideas or just go buy a piece they like. But what actually gets a wall right the first time isn’t finding a pretty picture first—it’s the order you do things in.
Hanging art is a project you can plan and get right on the first try. It just runs opposite to most people’s instinct: start from the wall and the art you want to show, and leave buying and drilling for last. Get the order right and every step builds on the one before it—instead of discovering the piece is too small, too high, or wrong for the furniture only after it’s on the wall.
The short answer: plan wall art in this order—① get your foundation ready (recreate your own wall in HangPlanner and choose the art you want to show), ② set the plan (pick a layout, then check sizes and hanging height), ③ buy and install (budget and order, get the household’s sign-off, and export the install sheet). Do the whole thing in HangPlanner against your real wall—from a blank wall to installed.
This guide walks that complete, blank-wall-to-installed process step by step—what to do at each stage, how to do it in HangPlanner, and where to go deeper.
The lazy default
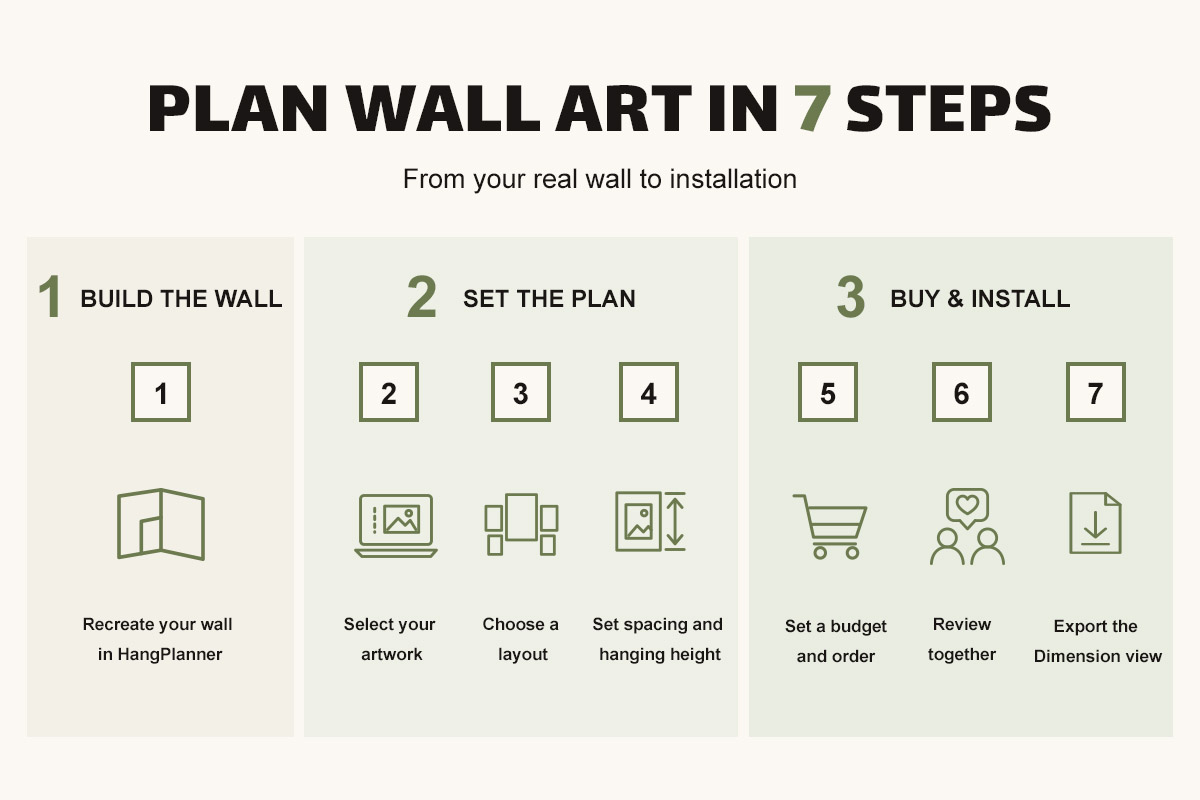
Work the seven steps in order, don’t skip: ① recreate your own wall → ② choose the art you want to show → ③ pick a layout → ④ check sizes and hanging height → ⑤ budget and order → ⑥ get sign-off → ⑦ export and install.
One rule of thumb: recreate your real wall and settle on the art first, then talk about how to arrange it and what to buy—dragging pieces onto your actual wall reads far truer than imagining it from a product photo.
Want a run-through without signing up? Open the Demo wall and you can walk the whole process.
The full process breaks into three parts, seven steps—one part at a time:
- Get your wall and art ready (steps 1–2): recreate your own wall, choose the art you want to show
- Set the plan (steps 3–4): pick a layout, check sizes and hanging height
- Buy and install (steps 5–7): budget and order, get sign-off, export and install
Part 1 · Get your wall and art ready
The first two steps don’t involve any buying. They do one thing: get your materials ready—recreate the real wall you’re planning on screen, then settle on the art you want to show. Once that’s set, choosing a layout and sizes has something to measure against.
Step 1 · Recreate your own wall in HangPlanner
First decide which walls get art—one wall, just handle that one; a whole home, pick the walls worth it (the first thing you see walking in, above furniture, the end of a sightline get priority; leave the rest bare rather than covering every wall). Then bring each real wall onto the screen, so everything you try after that happens on your actual wall, at true scale.
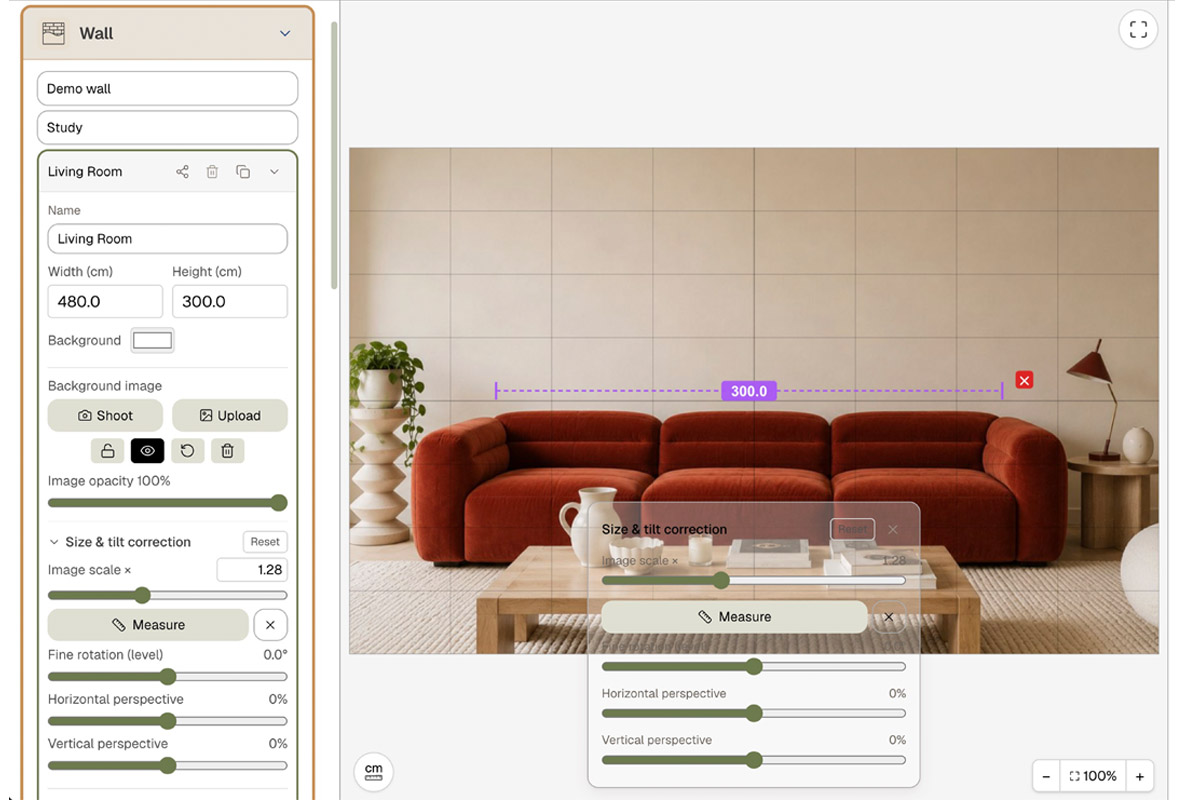
In HangPlanner: create a Wall for each wall you’re hanging (for a whole home, use Add Wall to build them one by one and Tags to label by room and switch between them); enter the wall’s real Width × Height (cm or inch); use Background Image to drop a phone photo of that wall behind the canvas and drag the four corners to correct the perspective; then set the scale from something of known size (a sofa’s width, a door’s width, a skirting board’s height all work). Once it’s aligned, any frame you drag onto the canvas shows at true scale on your actual wall. No photo handy? You can also use the Furniture library to place true-size furniture—sofa, bed, TV unit—below the wall and recreate the scene from their proportions (Furniture is free and works without signing in). To try it without an account, just use the Demo wall.
If you uploaded a wall photo, the sofa, windows, and outlets are already in it—just place frames to work around them; there’s no need to add furniture or mark obstacles separately.
Which walls to decorate and which to leave bare, planning a whole home without repeating the same look, small apartments, and open-plan spaces each get their own guide—as do sizing and placement, and trickier walls with a TV or fireplace, lots of windows and doors, or off-center furniture. (Links to follow as those guides go live.)
Step 2 · Choose the art you want to show
With the wall recreated, decide what this wall will actually show—it can be art you already own, or something you want to print fresh.
In HangPlanner, you can mix two sources:
- What you already own: upload your own photos to My Images (stored in the cloud, across devices); for pieces already framed, or a product photo of a finished piece from a shop, use Add Image as Framed Art to upload the whole image → crop (rounded corners supported) → enter the real size.
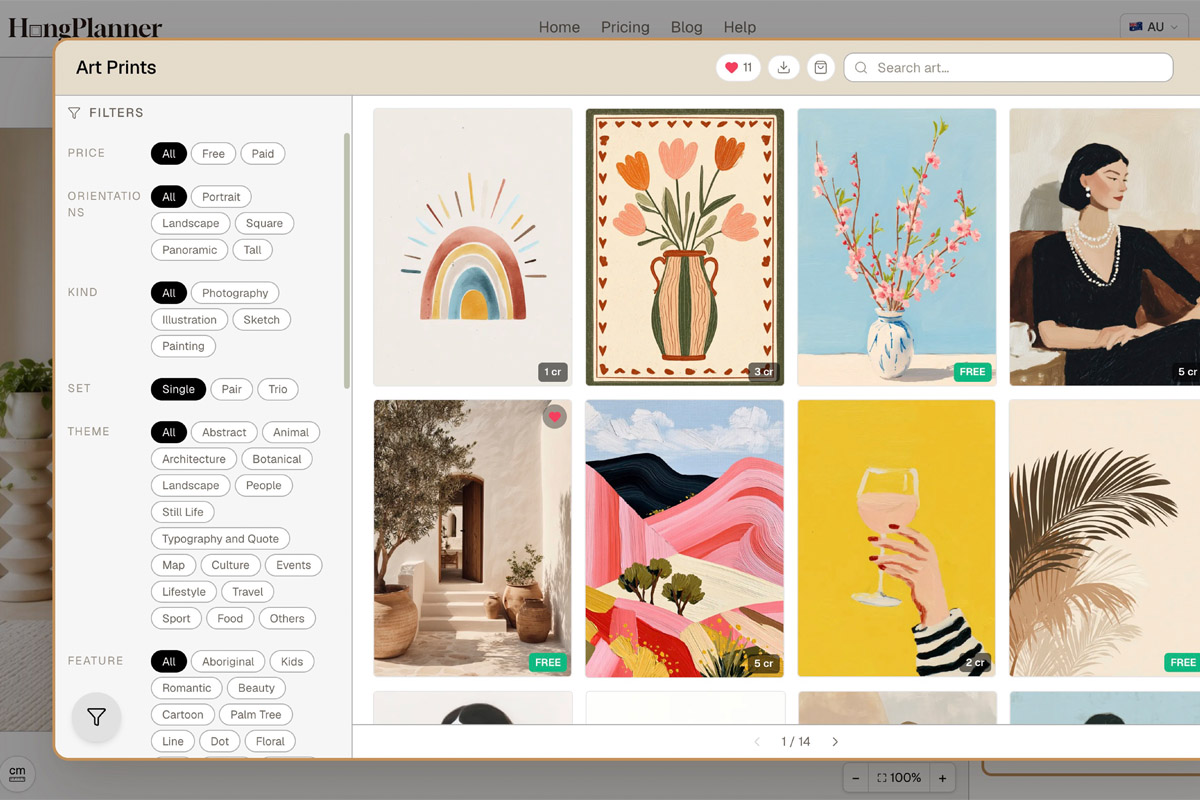
- Something to print fresh: browse the built-in Art Prints library—hundreds of illustrations, paintings, photography, and sketches you can search and favorite by theme, orientation, and color, each marked Free or priced in credits; drop one into a frame to preview it on the wall, and print it only once you’re happy.
Either way, the art shows at true scale on the wall you just recreated, so you can compare on your real wall before choosing a layout.
Where to hang art you already own, and how to make an existing piece fit a new wall, each get their own guide.
Part 2 · Set the plan: layout + sizes
With the wall and the art ready, decide how to arrange them and how big each piece should be. The key is that both steps come from your wall, not from copying a photo of someone else’s room.
Step 3 · Pick a layout
From your wall’s constraints—wall width, the width of the furniture below, viewing distance—pick an arrangement: one large piece, a pair, a triptych, a tidy grid, a focal layout, symmetrical, or up a staircase. A wide wall with a long piece of furniture below suits a spread-out arrangement; a narrow wall or hallway suits a single row or a vertical stack.
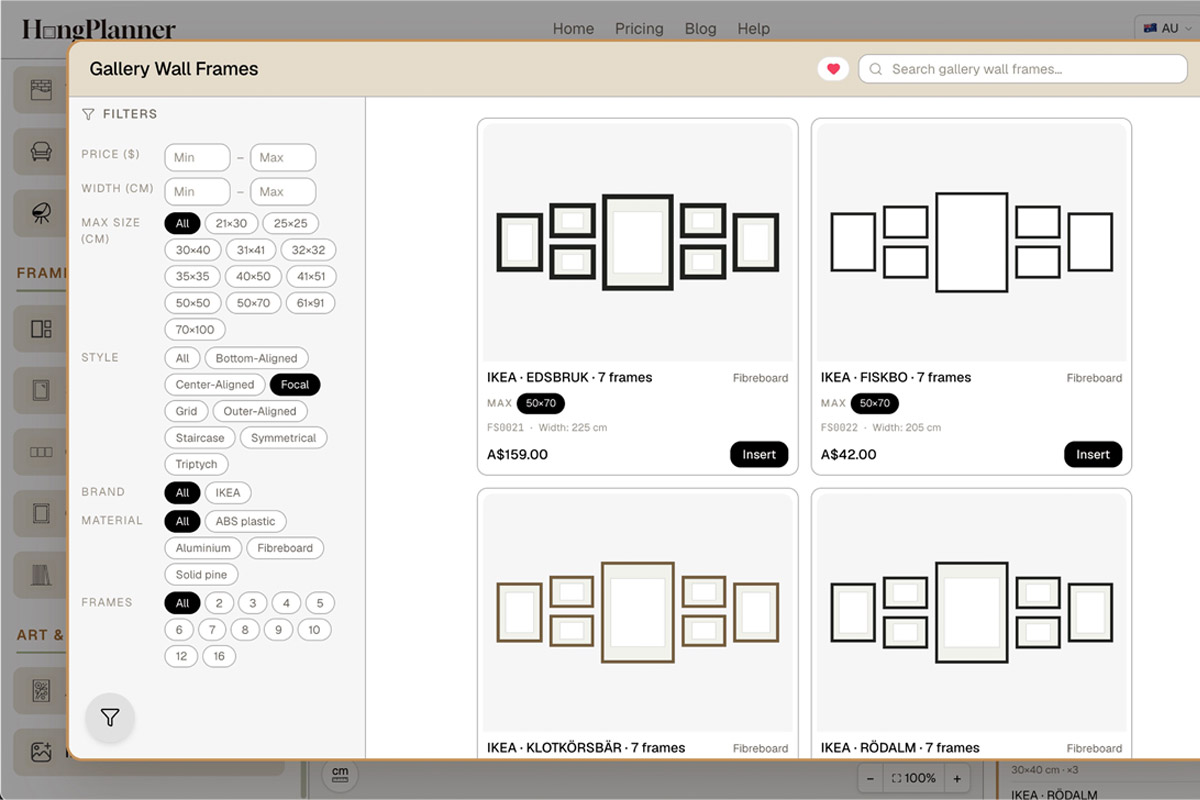
In HangPlanner: Gallery Wall Frames drops a whole pre-arranged set on the wall in one click (Triptych / Grid / Focal / Symmetrical / Staircase and more—the count, sizes, and spacing are worked out for you, and you can ungroup to fine-tune after it lands), or use Standard Frames to drag in true-size IKEA frames that are currently in stock; turn on Show total bounds to see the whole arrangement’s outer edge. Use the ready-made presets for count and size rather than guessing.
Which layout suits what, and one large piece versus several small ones, each get their own guide; for the how-to, see our grid gallery wall and focal gallery wall guides.
Step 4 · Check sizes and hanging height
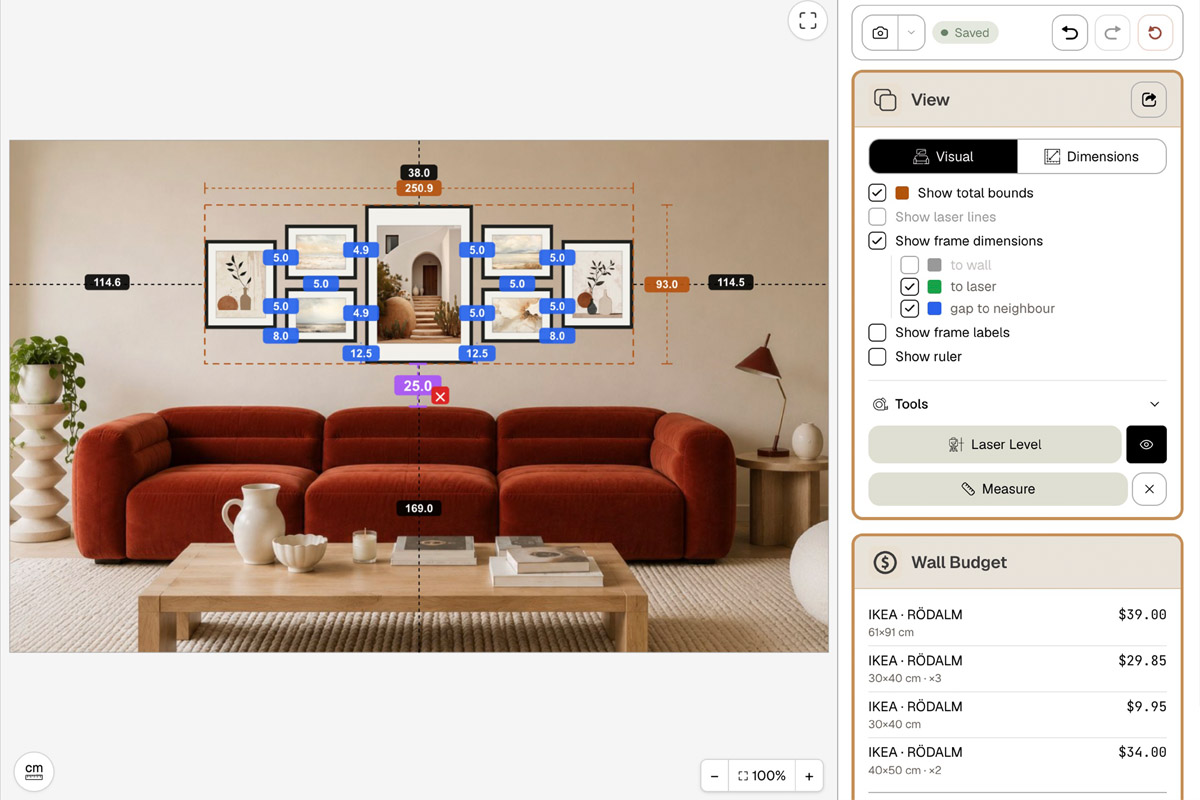
With the layout set, check two sets of numbers. Size: the arrangement’s horizontal span should reach 2/3–3/4 of the wall width, or of the furniture below it, so it holds its own and doesn’t look small. Hanging height: on a standalone wall, put the arrangement’s visual center around eye level—a common reference is 57 inches (150 cm) (the average eye height galleries use)—but that’s just an average; set it mainly by the height of the people who live there: nudge it up if they’re generally taller, down if shorter, don’t cling to 150 cm. When there’s furniture below (a sofa, say), anchor to the furniture instead—the bottom row’s lower edge sits 6–10 inches (15–25 cm) above the sofa’s back. Leave 2–3 inches (5–7 cm) between frames.
In HangPlanner: pull a level eye-line with Laser Level and let frames snap to it; use Total bounds to check the span against 2/3–3/4; use Measure for the gaps between frames; switch to the Dimensions view and every frame’s size, nail position, and distance to the wall edge and its neighbors is labeled. All of it before anything goes in the cart.
For how tight to make the gaps, see our spacing guide.
Part 3 · Buy and install
With the plan settled on screen, the last three steps turn it into a real wall: cost it, order it, confirm it, hang it.
Step 5 · Budget and order to size
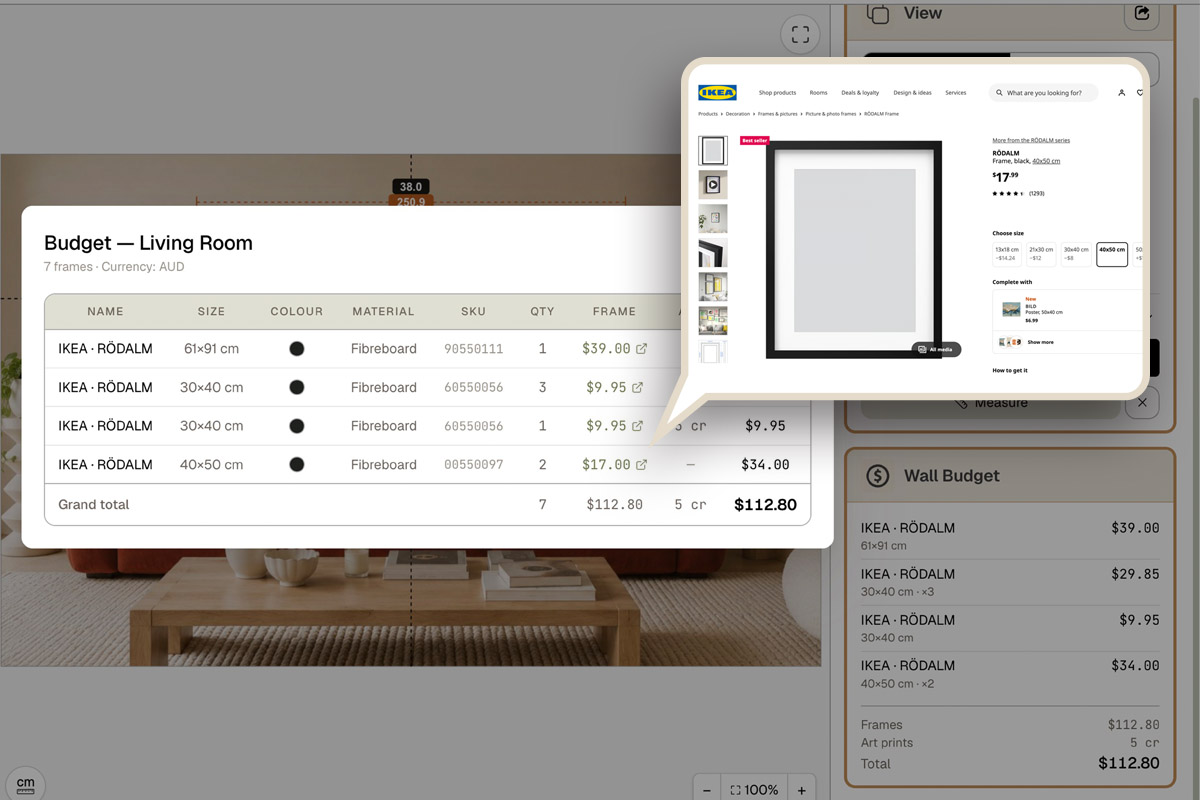
Buy the frames you chose, to their real sizes. The point of this step is knowing the total before checkout, not discovering you’re over once it’s in the cart.
In HangPlanner: Wall Budget adds up every frame on the canvas in real time, flags “X of Y priced” (how many have a price filled in), and turns red when you go over your set budget; open the detail table to Print a shopping list and jump to the retailer row by row to check out. The IKEA models in Standard Frames carry each country’s price and a buy link.
For each frame series’ standard sizes and what print size to buy, see standard picture frame sizes.
Step 6 · Get the household’s sign-off
Before it goes up, let whoever lives there take a look and agree—what to hang, which arrangement—and settle it on screen, which beats reworking it after it’s on the wall.
In HangPlanner: use Share wall to send a collaboration link (the other person can be CAN EDIT to change it with you, or VIEW ONLY to just look), and both of you can edit the same wall in real time; use Snapshots to save plan A and plan B side by side to compare; or just export a Visual view to send them the look.
Step 7 · Export and install
Once it’s settled, hang it to plan. You don’t have to eyeball it on the wall—the wall you planned produces a dimensioned install sheet directly.
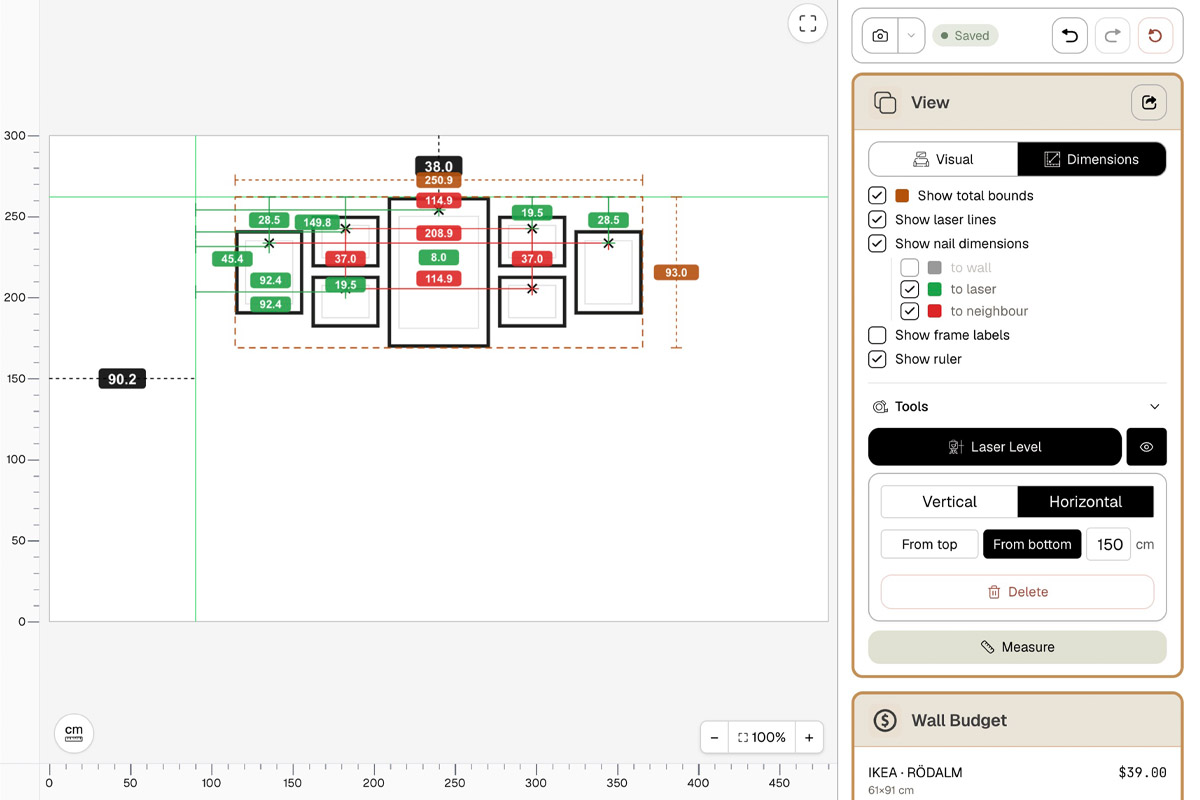
In HangPlanner: switch to the Dimensions view, where every frame’s size, nail position, and distance to the wall edge and its neighbors is labeled; export the Dimension view (free) and mark the points on the wall by the numbers to hang it; to make it even easier, use the 1:1 quick install image to print a life-size template, stick it to the wall, and drill straight through the marks.
For fixings, see our no-drill picture hooks and renter-friendly hanging guides.
Chain these seven steps together in HangPlanner and you go from a photo of a blank wall to an install sheet you can drill by: the same real wall, recreated once, tried until it’s right, bought in one go, hung once. For a whole home, repeat the process wall by wall in the multi-wall workspace. Want a run-through without signing up? The Demo wall lets you walk every step above.