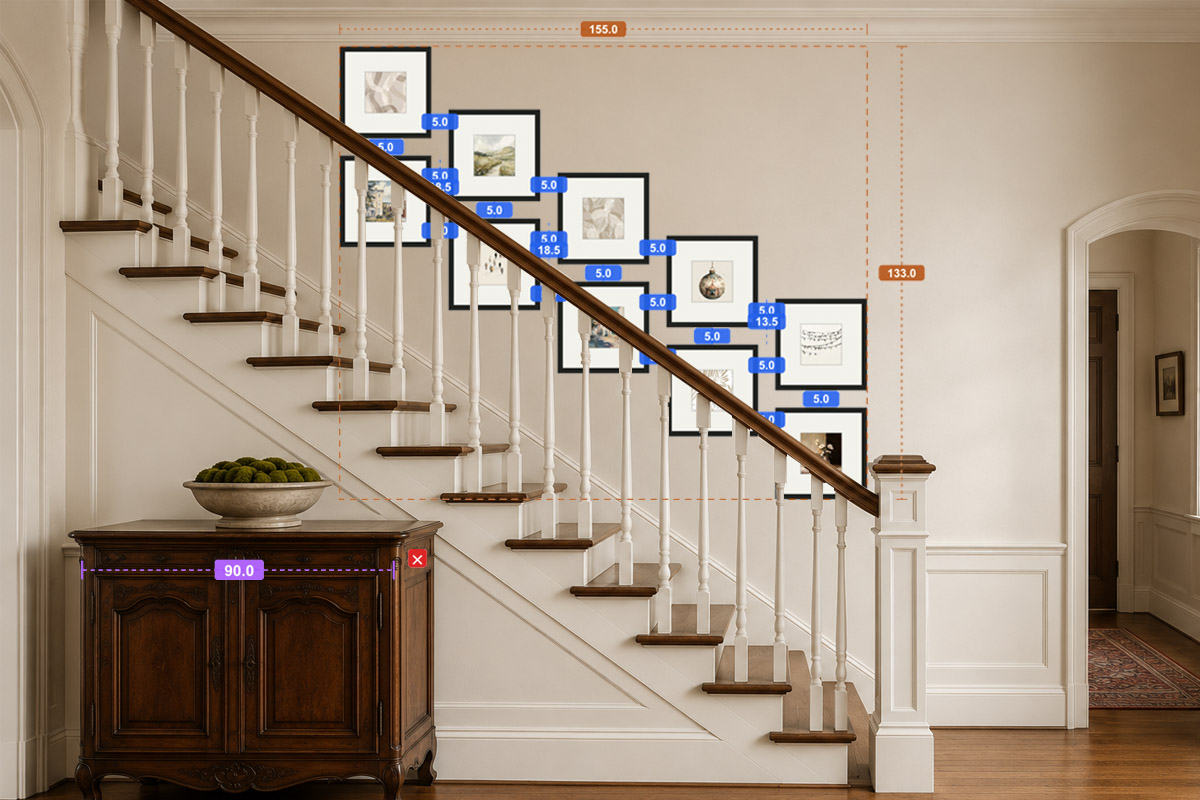
Staircase Gallery Wall with IKEA Frames
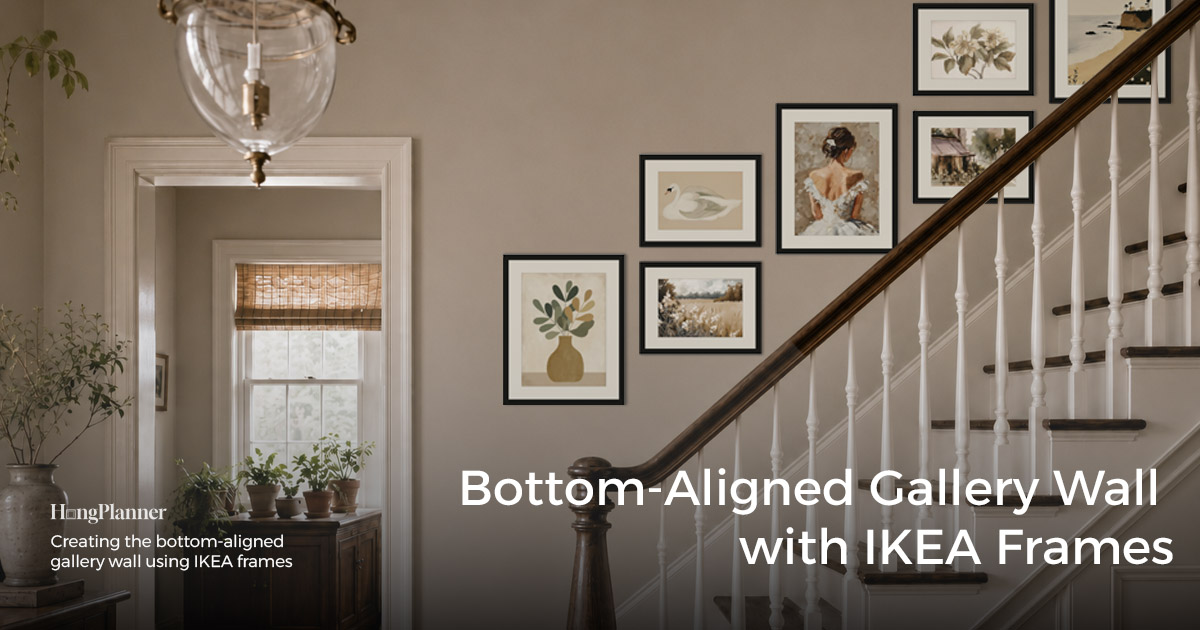
A staircase gallery wall comes down to one move: draw an invisible diagonal that runs parallel to the slope of your stairs, and keep the center of every frame on that line. Stair walls feel hard to hang not because they’re sloped, but because most people are still using the flat-wall playbook — find a horizontal line, line the art up on it. On a staircase there’s no horizontal line to lean on; the line you lean on is the diagonal that climbs, step by step, with the stairs.
Get that diagonal right and everything else follows: the frames climb along it, your eye rises with the steps, and the whole group belongs to the staircase instead of sitting stuck on the wall.
This guide covers three things: how to set that diagonal baseline, whether each frame should sit center-on-the-line or bottom-on-the-line, and how to pick frames and build a rhythm. A stairwell is hard to reach and a wrong hole is painful to patch, so the last step — planning it in HangPlanner before you climb the ladder — is especially worth it.
Quick default
Baseline: picture a diagonal that runs parallel to your stair stringer or the stair nosing, and let the whole group climb along it. Plan a version over a photo in HangPlanner first; on the real wall, snap it with a chalk line or painter’s tape.
Anchoring: keep each frame’s center on that diagonal (center-on-the-line — more forgiving than bottom-on-the-line, steady even with mixed sizes).
Frames: just Insert a ready staircase preset in HangPlanner — 7 frames is the standard set (about 178–205 cm / 70–81 in wide); go up to 12 for a long or tall stairwell. One series in one color is easiest (e.g. RÖDALM comes in several sizes); alternate portrait and landscape for rhythm.
Before you drill: stairwells are high, hard to reach, and with mixed sizes every frame’s hook height is different — lay it out along the diagonal in HangPlanner and get each hook height first, then climb the ladder.
Why a stair wall works off a diagonal, not a height
On a flat wall you’re standing still when you look, so you find one horizontal line and drop the group at eye level. A staircase is different: you’re looking while you walk up and down — there’s no single spot to stand. Force a horizontal line onto a stair wall and the art either fights the rising steps or looks like it’s sliding downhill.
A line that follows the stair slope fixes exactly that. It lets the whole group rise with the steps — whichever tread you’re on, that stretch of art lands in comfortable view. That diagonal usually runs parallel to two ready references: the stair stringer (the sloped edge on the side of the staircase) and the stair nosing (the line connecting the front edge of each tread). Both are the stair’s pitch made visible; line up to them and the group’s slope matches the staircase naturally.
One line to remember: order on a stair wall doesn’t come from “how high,” it comes from “as sloped as the stairs.”
Two ready diagonal layouts you can shop
Don’t want to arrange from scratch? HangPlanner already has two staircase layouts built along this diagonal, matching the two most common stair-wall shapes — Insert one and the sizes, series, and color are set in one go:
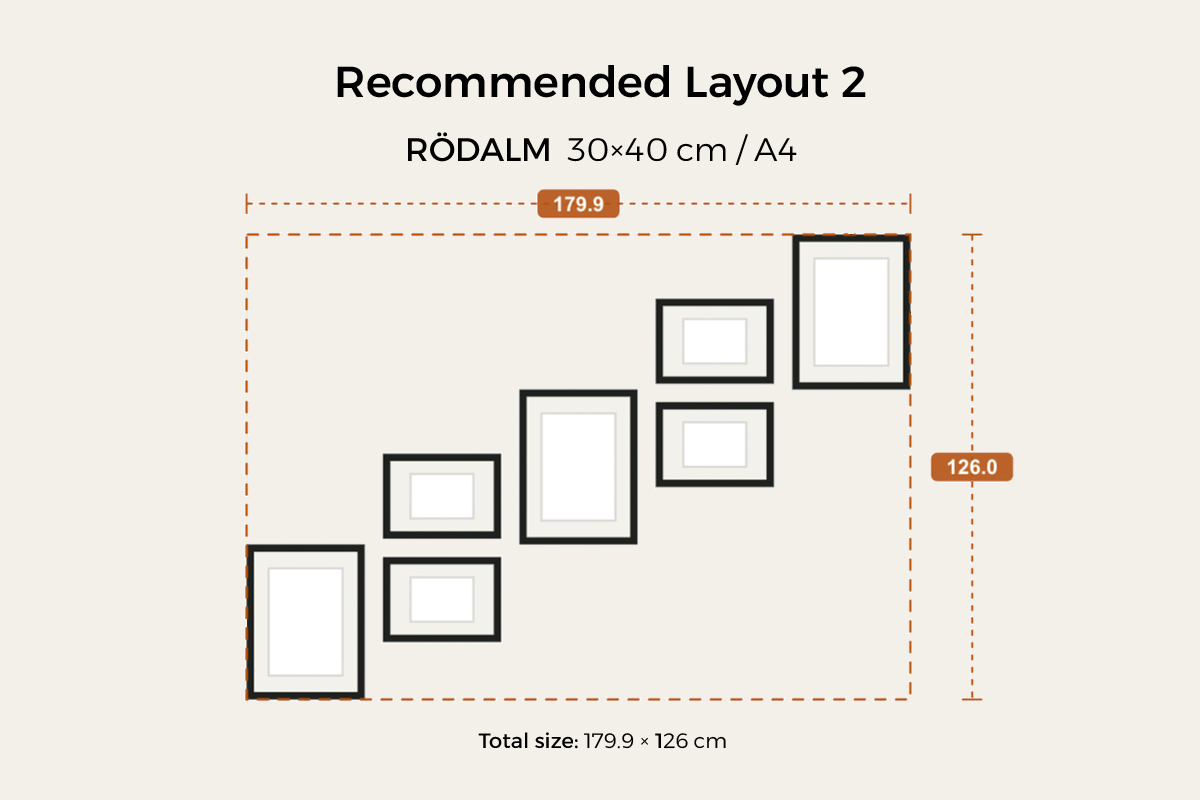
Option A · 7-frame standard climb (about 178–205 cm / 70–81 in wide). The default for a single straight flight: 7 small-to-medium frames step up the diagonal one by one, sizes varied, orientation alternating, topping out at 30 × 40 cm (about 12 × 16 in). All eight in-stock series carry the same set — RÖDALM, KNOPPÄNG, FISKBO, HÄCKHAGTORN, LOMVIKEN, KLOTKÖRSBÄR, SILVERHÖJDEN, EDSBRUK — pick one series and you’ve got a single, consistent palette.
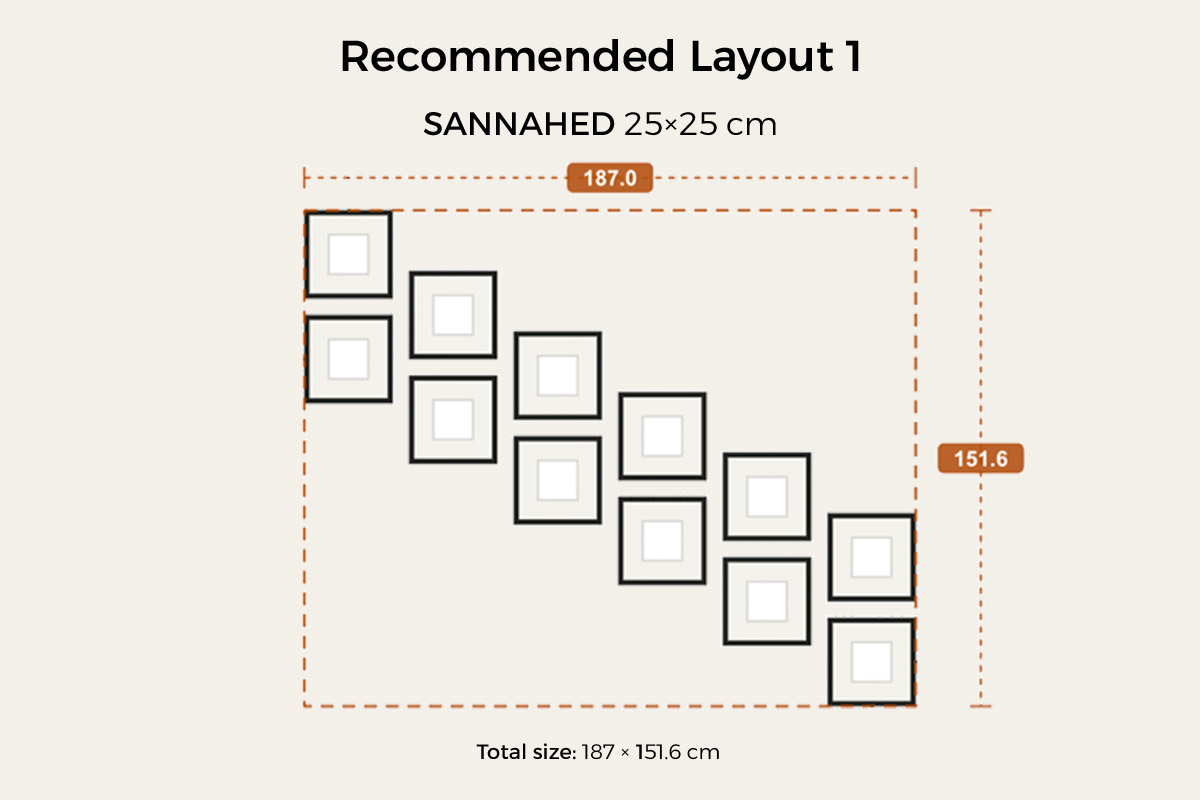
Option B · 12-frame double column for long stairwells (about 187–226 cm / 74–89 in). For a long, tall stairwell you want to fill: 12 square frames run down the stairs in two columns, dense but tidy. Two choices — LOMVIKEN 32 × 32 cm (about 12.6 in square, a slim aluminium profile that looks like it floats) and SANNAHED 25 × 25 cm (about 10 in square, a deep box frame with the most depth).
Set your diagonal baseline: pick one of three references
All three references run parallel to the stair slope — use whichever is easiest to measure where you are:
Stair nosing. The most accurate. The line connecting the front edge of each tread is the stair pitch itself. Want the art to “hug the stairs”? Use this.
Stringer. The full sloped edge on the side of the staircase — the easiest single straight line to eyeball, good for roughing in the overall slope on the wall.
Handrail. If there’s a handrail on this wall, it runs parallel to the stair slope — a ready reference. Draw your diagonal a fixed distance above the handrail; easiest of all.
How to set it: measure the stair slope (pull a line along any of the three references), then shift that diagonal up or down the wall to the height you want — no exact number needed, just get the lowest frame roughly into comfortable view as you come down. This diagonal is the one thing on the whole wall worth being fussy about; if it’s off, the whole group falls apart. On the wall, snap it out with a chalk line or painter’s tape along that slope — don’t eyeball it.
Plan a version in HangPlanner first. Stand back and get the whole flight of stairs into one photo, upload it, and calibrate the scale using a known size like a step height or the handrail. Then Insert a ready staircase preset — it’s already arranged along the diagonal, so you just drag the whole group to line up with the stair edge in your photo and let it run parallel to the slope; no need to work out the angle yourself. The proportions, gaps, and every hook height are marked on screen — follow them onto the wall.
Center on the line or bottom on the line
Once the frames go up, which edge you anchor sets the whole mood. Two main methods:
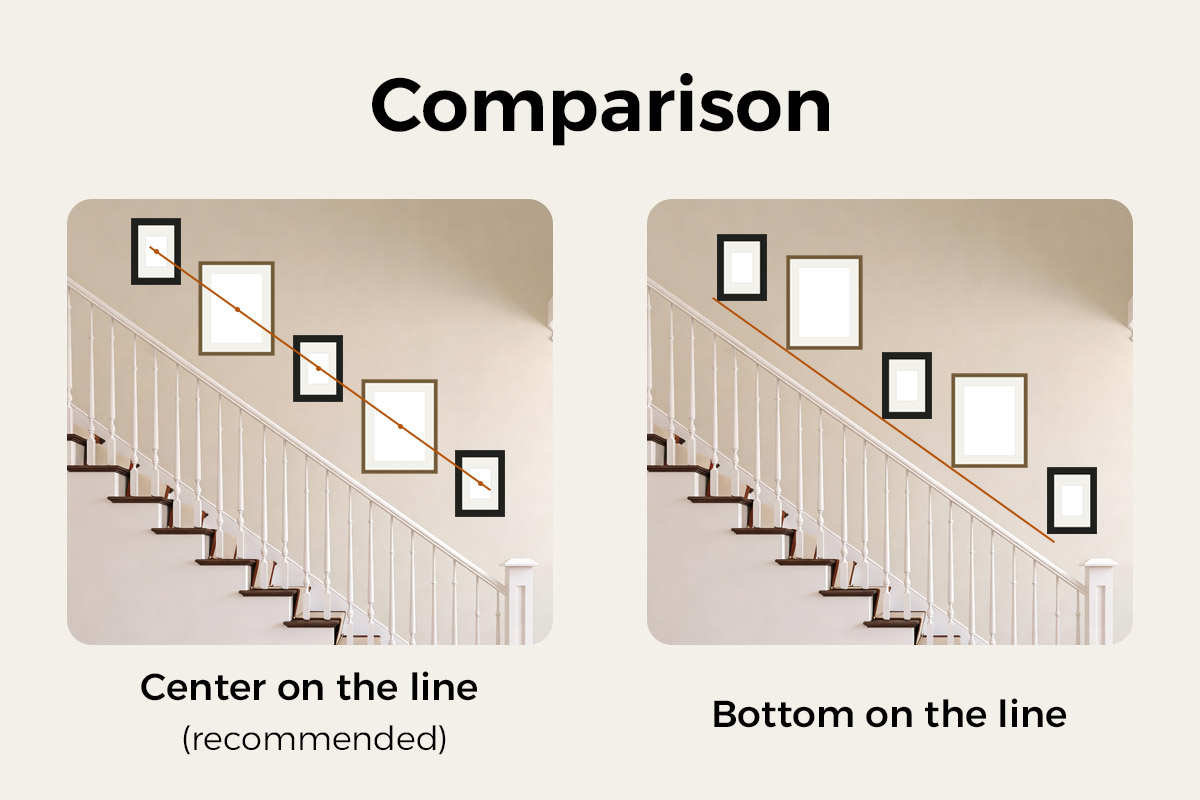
Center on the line (recommended). Put each frame’s geometric center on the diagonal baseline. The upside is forgiveness — when sizes vary, big frames spill out to the sides and small ones tuck in, but every center sits on the same “spine,” so it reads steady. Stair walls tend to mix sizes anyway, so center-on-the-line is the hardest to get wrong — start here if you’re new.
Bottom on the line. Put each frame’s bottom edge on the diagonal. Tidier, more orderly — but sensitive to size differences: with bottoms level, big frames push up noticeably and small ones look short, strong rhythm but easy to go top-heavy. Use it when you want crisp uniformity and the frames are close in size. (On a flat wall, aligning bottom edges is its own approach — see bottom-aligned gallery walls.)
Not sure? Try both — center-on-the-line and bottom-on-the-line feel completely different on the same wall, and dragging one of each in HangPlanner is the fastest way to compare.
Picking frames and building rhythm
Count — follow the length of your stairs. Easiest is to grab one of the two ready layouts above: a single straight flight takes the 7-frame standard climb, a long or tall stairwell the 12-frame double column. Insert one and trim it to your stairs.
Size — small-to-medium, with one focal point. A staircase is a walk-through space with short viewing distance, so small-to-medium frames wear best: 21 × 30 cm (about 8 × 12 in) and 30 × 40 cm (about 12 × 16 in) as the base, with one or two 40 × 50 cm (about 16 × 20 in) as a focal point — don’t crowd the stairs with all-large frames. (The presets top out at 30 × 40 cm by default, and most series scale up to 40 × 50 / 50 × 70 cm.)
Alternate portrait and landscape for rhythm. Every rectangular IKEA frame can hang either way — the product page shows hook positions for both orientations. Alternating along the diagonal gives more lift than one uniform direction. Square frames hang one way only, since they look the same rotated.
One series and color to hold the slope together. A stair wall already has diagonal motion; busy frames scatter it. One series in one color is easiest — RÖDALM alone comes in 21 × 30, 30 × 40, and 40 × 50 cm, all matching, so mixing sizes still reads clean. You can mix further, but give it one unifying element (same color, same mount color, or one theme) to hold it. Any in-stock series works (RÖDALM / KNOPPÄNG / LOMVIKEN and the rest) — skip the discontinued Ribba.
Theme — stairs are made for a story. Walking up from the bottom is a timeline in itself. Family photos rising by year, travel shots by the places you’ve been, black-and-white in one consistent tone — a staircase is one of the few gallery-wall spots built for storytelling.
Plan it in HangPlanner before you climb the ladder
A stair wall is the one gallery wall you should never eyeball, for three reasons:
First, it’s hard to reach and expensive to redo. Stairwell walls are high, you’re bracing a ladder across the steps, and drilling is risky to begin with; one wrong hole means filler, a repaint, and a lost weekend — far more than a flat-wall mistake.
Second, a diagonal is nearly impossible to eyeball. On a flat wall you’d catch a tilt; on a slope there’s no reference for “how much slant is right,” and one frame off breaks the whole diagonal.
Third, every frame’s hook height is different. The distance from a frame’s hook to its top changes with size; add alternating orientation and you’re working out each nail height one by one along the diagonal — the easiest thing to get wrong by hand.
HangPlanner handles all three at once: stand back, get the whole flight into one photo, upload it, calibrate the scale with a known size like a step height or the handrail, then —
- Insert a ready staircase preset (7-frame standard / 12-frame long stairwell) — already arranged along the diagonal — or drag in your own frames
- Drag the whole group to line up with the stair edge in your photo, parallel to your slope
- Nudge it to center-on-the-line (every frame’s center on one diagonal), or switch to bottom-on-the-line to compare
- Alternate orientation, move the focal frame, try a few rhythms
- Open Dimensions to see the group’s span along the diagonal and every gap between frames
- Mark the wall from each frame’s calculated hook position — mixed orientation, mixed sizes, still nailed to the diagonal in one go
- Open Wall Budget to compare the cost of different combinations
Getting that diagonal steady on screen is far cheaper than drilling a wrong hole in the stairwell and hauling the ladder back for a repaint.